Blog

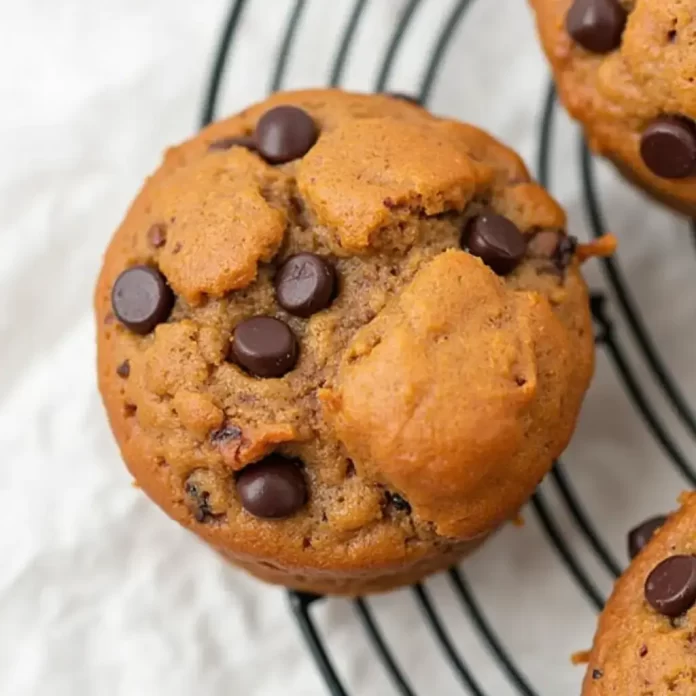
Pumpkin Protein Muffins: A Nutritious and Delicious Treat for Every Occasion

0

Why Pumpkin Protein Muffins Deserve a Spot in Your Diet

There’s something about the cozy flavors of pumpkin that make fall feel complete. But what if you could enjoy that warm, spiced goodness while also fueling your body with protein? Pumpkin Protein Muffins bring together the best of both worlds—delicious seasonal flavors and muscle-supporting nutrients. Whether you need a quick breakfast, a post-workout snack, or a guilt-free dessert, these muffins are your perfect go-to option.

In this article, you’ll learn everything you need to know about Pumpkin Protein Muffins—their health benefits, a step-by-step recipe, customization ideas, storage tips, and answers to common questions. Let’s dive in!

Health Benefits of Pumpkin Protein Muffins

A Perfect Balance of Flavor and Nutrition

These muffins are more than just a tasty treat; they offer multiple health benefits that make them a smart choice for any meal or snack.

1. High in Protein for Muscle Growth and Recovery

Protein is essential for repairing and building muscle. Whether you’re an athlete or just trying to maintain a healthy lifestyle, adding protein to your diet can help with recovery and satiety. The protein powder in these muffins ensures you get a nutritious boost.

2. Rich in Fiber for Digestive Health

Pumpkin and oats are loaded with fiber, which aids in digestion, promotes gut health, and helps regulate blood sugar levels. Fiber also keeps you fuller for longer, reducing unnecessary cravings.

3. Packed with Vitamins and Antioxidants

Pumpkin is a powerhouse of vitamins A and C, which support immunity and skin health. The spices used—like cinnamon and nutmeg—are rich in antioxidants that help combat inflammation.

4. Low in Sugar Yet Naturally Sweet

Instead of relying on processed sugars, these muffins use natural sweeteners like maple syrup or honey, along with the inherent sweetness of pumpkin.

Ingredients for Pumpkin Protein Muffins

Simple, Wholesome Ingredients

Here’s what you’ll need to make these fluffy, nutrient-packed muffins:

IngredientQuantityBenefit
Pumpkin Puree1 cupRich in fiber and vitamins
Protein Powder1/2 cupBoosts protein content
Rolled Oats1 cupAdds fiber and texture
Almond Flour1/2 cupProvides healthy fats
Eggs2Helps bind ingredients
Baking Powder1 tspHelps muffins rise
Cinnamon1 tspAdds warm, spiced flavor
Nutmeg1/2 tspComplements pumpkin’s sweetness
Maple Syrup1/4 cupNatural sweetener
Vanilla Extract1 tspEnhances flavor
Almond Milk1/2 cupKeeps muffins moist
Dark Chocolate Chips1/4 cup (optional)Adds a touch of indulgence

How to Make Pumpkin Protein Muffins

Step-by-Step Guide to Baking the Perfect Muffins

1. Preheat the Oven
Set your oven to 350°F (175°C) and line a muffin tin with paper liners or grease it lightly.

2. Mix the Dry Ingredients
In a large bowl, combine protein powder, oats, almond flour, baking powder, cinnamon, and nutmeg. Stir until well incorporated.

3. Blend the Wet Ingredients
In a separate bowl, whisk together pumpkin puree, eggs, maple syrup, vanilla extract, and almond milk until smooth.

4. Combine and Mix
Gradually add the dry ingredients to the wet mixture, stirring until just combined. If adding dark chocolate chips or nuts, fold them in at this stage.

5. Fill and Bake
Distribute the batter evenly into the muffin cups, filling each about 2/3 full. Bake for 20-25 minutes or until a toothpick inserted in the center comes out clean.

6. Cool and Enjoy
Let the muffins cool for about 5 minutes in the pan, then transfer them to a wire rack to cool completely.

Customizing Your Pumpkin Protein Muffins

Make These Muffins Your Own

  • Boost the Protein: Use Greek yogurt or additional egg whites for an extra protein punch.
  • Go Gluten-Free: Swap oats for gluten-free oats and use almond flour exclusively.
  • Vegan-Friendly: Substitute eggs with flax eggs and use plant-based protein powder.
  • Add Some Crunch: Mix in chopped walnuts, pecans, or pumpkin seeds.
  • Extra Sweetness: Sprinkle coconut sugar on top before baking.

Storing and Freezing Your Muffins

Keep Your Muffins Fresh and Ready to Eat

  • Room Temperature: Store in an airtight container for up to 4 days.
  • Refrigerator: Keep them fresh for up to a week by storing in the fridge.
  • Freezing: Wrap individually and store in a freezer-safe bag for up to 3 months. Simply reheat in the microwave for 30 seconds before enjoying.

FAQs About Pumpkin Protein Muffins

Common Questions Answered

Q: Can I use fresh pumpkin instead of canned pumpkin puree?
A: Yes! Just make sure to drain excess moisture from fresh pumpkin puree to avoid a watery batter.

Q: What type of protein powder works best?
A: Whey protein gives a fluffy texture, while plant-based protein may create a denser muffin. Choose according to your preference.

Q: Can I make these muffins keto-friendly?
A: Yes! Use almond flour instead of oats and a sugar-free sweetener like monk fruit or erythritol.

Q: How can I make the muffins more moist?
A: Adding a tablespoon of coconut oil or Greek yogurt will make the muffins softer and moister.

Conclusion: Enjoy Your Pumpkin Protein Muffins Anytime!

Pumpkin Protein Muffins are a perfect blend of taste and nutrition, making them a great choice for breakfast, a midday snack, or a post-workout treat. With their warm, comforting flavors and health-boosting ingredients, these muffins can be your new favorite go-to baked good.

Try out the recipe today and let us know how you like them! Don’t forget to share this recipe with friends who love healthy, high-protein snacks.

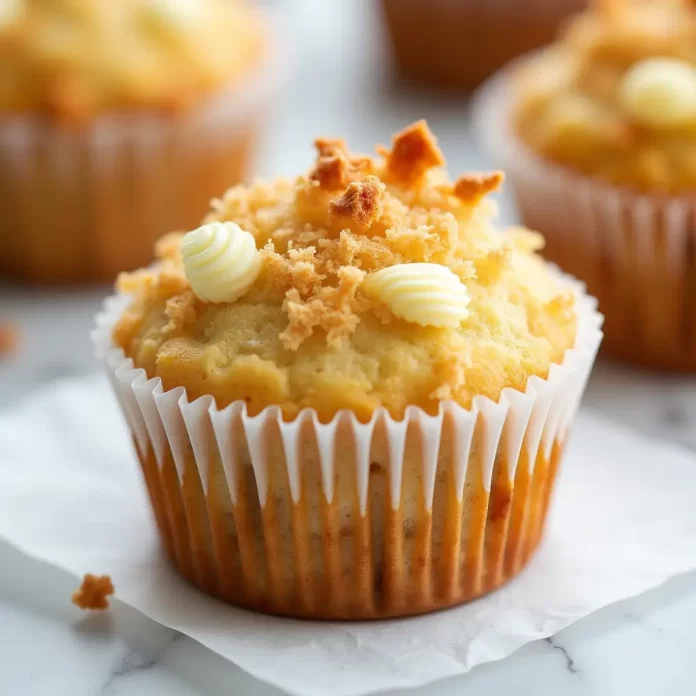
Coconut and Pineapple Cottage Cheese Muffins: A Tropical Delight You’ll Love

0

Imagine waking up to the irresistible scent of freshly baked muffins, only to discover that they’re packed with wholesome ingredients that nourish your body and satisfy your cravings. If you’re a fan of tropical flavors and looking for a healthy, high-protein treat, then Coconut and Pineapple Cottage Cheese Muffins might just become your new favorite recipe.

These muffins combine the rich creaminess of cottage cheese, the tropical sweetness of pineapple, and the nutty goodness of coconut. Not only do they taste amazing, but they are also packed with protein, healthy fats, and fiber. Whether you’re looking for a delicious breakfast, a snack to fuel your day, or a guilt-free dessert, these muffins will become your go-to treat.

Why Coconut and Pineapple Cottage Cheese Muffins Are the Ultimate Healthy Snack

You may be wondering why these muffins are such a nutritious choice. Let’s break it down:

1. High in Protein

Cottage cheese is a powerhouse of protein, making these muffins a great option for muscle repair, growth, and overall body maintenance. The slow-digesting casein protein found in cottage cheese can help keep you fuller for longer, preventing those mid-morning snack cravings.

2. Healthy Fats

Coconut provides medium-chain triglycerides (MCTs), a type of healthy fat that your body can quickly turn into energy. These fats also support brain function and help improve your metabolism. Combined with the healthy fats in cottage cheese, these muffins offer a balanced source of nourishment.

3. Rich in Fiber

Pineapple and oats are excellent sources of fiber. Fiber plays a vital role in digestive health, regulates blood sugar levels, and keeps you feeling satisfied after meals. The fiber content in these muffins ensures that they’re not only delicious but also beneficial to your gut.

4. Low Sugar and Naturally Sweetened

Instead of relying on refined sugar, these muffins get their natural sweetness from pineapple and a touch of honey or maple syrup. This keeps the sugar content low while providing essential vitamins like Vitamin C and manganese from the pineapple.

5. Easy to Make and Customizable

These muffins are incredibly easy to prepare, even for beginners. With just a few simple steps and ingredients, you’ll have a batch of muffins ready to enjoy in less than 30 minutes. Plus, the recipe is highly customizable to suit your dietary needs—whether you’re gluten-free, vegan, or looking for an extra protein boost.

Ingredients for Coconut and Pineapple Cottage Cheese Muffins

Before you get started, make sure you have these ingredients on hand for the perfect muffins:

IngredientQuantityBenefit
Cottage Cheese1 cupHigh in protein and calcium
Shredded Coconut1/2 cupHealthy fats and fiber
Pineapple (chopped)1/2 cupNatural sweetness and Vitamin C
Oats1 cupFiber, iron, and energy
Eggs2Protein, binding agent
Baking Powder1 tspHelps muffins rise
Honey or Maple Syrup2 tbspNatural sweetener
Almond Milk1/4 cupKeeps muffins moist
Vanilla Extract1 tspAdds flavor
Cinnamon (optional)1/2 tspFlavor enhancer and antioxidant

Step-by-Step Guide to Making Coconut and Pineapple Cottage Cheese Muffins

Making these muffins is incredibly easy, even if you’re not an expert baker. Follow these simple steps to create a batch of muffins that are both delicious and nutritious.

Step 1: Preheat and Prepare

Start by preheating your oven to 350°F (175°C). Prepare a muffin tin by lining it with paper liners or lightly greasing it with cooking spray or coconut oil. This ensures your muffins won’t stick and will come out with a perfect golden-brown exterior.

Step 2: Combine the Wet Ingredients

In a large bowl, mix the following wet ingredients:

  • Cottage cheese: This will provide the creamy texture and protein.
  • Eggs: These help bind the ingredients together while adding more protein.
  • Almond milk: Keeps the muffins moist and tender.
  • Honey or maple syrup: Sweeten the muffins naturally.
  • Vanilla extract: Adds an extra layer of flavor.

Stir these ingredients together until they are fully combined, ensuring the mixture is smooth and creamy.

Step 3: Mix the Dry Ingredients

In a separate bowl, combine the dry ingredients:

  • Oats: A great source of fiber, oats provide a hearty texture.
  • Shredded coconut: Gives a tropical flavor and healthy fats.
  • Baking powder: Helps the muffins rise, making them light and fluffy.
  • Cinnamon (optional): Adds warmth and flavor, while offering antioxidant benefits.

Mix these ingredients thoroughly.

Step 4: Combine Wet and Dry Ingredients

Slowly add the dry mixture to the wet ingredients, stirring gently until just combined. Be careful not to overmix, as this could make the muffins dense. Once combined, gently fold in the chopped pineapple to add that burst of sweetness.

Step 5: Bake the Muffins

Spoon the muffin batter evenly into the prepared muffin tin, filling each cup about two-thirds full. This will give them room to rise without overflowing. Bake the muffins in the preheated oven for 18-20 minutes, or until a toothpick inserted into the center of a muffin comes out clean.

Step 6: Cool and Serve

Let the muffins cool for about 5 minutes in the tin before transferring them to a wire rack to cool completely. This allows the muffins to set and ensures they won’t fall apart.

Customizing Your Coconut and Pineapple Cottage Cheese Muffins

While this recipe is already packed with healthy ingredients, you can always customize it to suit your taste or dietary needs. Here are some ideas:

Add Extra Protein

  • If you’re looking for an even higher protein content, consider adding protein powder to the mix. You can use your favorite flavor, such as vanilla or chocolate, to enhance the taste.

Make Them Gluten-Free

  • If you’re following a gluten-free diet, simply swap out the oats for gluten-free oats or almond flour. Both options provide a delicious and safe alternative.

Go Vegan

  • For a vegan version, replace the eggs with flax eggs (1 tbsp ground flaxseed mixed with 3 tbsp water for each egg) and use a plant-based sweetener like agave syrup instead of honey.

Add More Texture

  • Incorporate some chopped nuts such as almonds or walnuts for added crunch. You can also mix in raisins or dried coconut flakes for extra sweetness and texture.

How to Store Your Muffins for Maximum Freshness

Room Temperature:

Store the muffins in an airtight container at room temperature for up to 4 days. This will keep them fresh and ready to eat whenever you’re craving a healthy snack.

Refrigeration:

For longer storage, place the muffins in the refrigerator for up to 1 week. Make sure they are tightly sealed to avoid drying out.

Freezing:

If you’ve made a big batch, freeze the muffins for up to 3 months. Wrap them individually in plastic wrap or parchment paper, then place them in a freezer-safe bag. To enjoy, simply reheat them in the microwave for about 20 seconds.

FAQs About Coconut and Pineapple Cottage Cheese Muffins

Q: Can I use fresh pineapple instead of canned?

Absolutely! Fresh pineapple works just as well as canned pineapple. Just chop it finely and drain any excess liquid to avoid making the muffins too wet.

Q: Can I substitute cottage cheese?

If you don’t have cottage cheese, you can use Greek yogurt for a similar creamy texture and added protein. However, cottage cheese adds a unique flavor and consistency that’s hard to replicate.

Q: Are these muffins suitable for a keto diet?

These muffins are not keto-friendly because they contain oats and pineapple, which are relatively high in carbs. However, you can modify the recipe by replacing oats with almond flour and using a low-carb sweetener.

Q: How can I make these muffins fluffier?

To make your muffins fluffier, don’t overmix the batter. Additionally, you can add an extra egg white for added airiness.

Q: How many muffins does this recipe yield?

This recipe typically yields 12 standard-sized muffins.

Conclusion: Enjoy a Tropical Treat with Coconut and Pineapple Cottage Cheese Muffins

These Coconut and Pineapple Cottage Cheese Muffins are more than just a delicious snack; they’re a nutritious option that supports your health goals while satisfying your sweet tooth. Whether you’re looking for a post-workout recovery snack, a wholesome breakfast, or an afternoon treat, these muffins offer the perfect balance of protein, healthy fats, and natural sweetness.

Try baking them today and bring

Delicious Protein Cookies Made Easy: Wholesome and Tasty Snacks in Minutes

0

When you’re craving something sweet, but also need a healthy boost to power through your day, making protein cookies can be your perfect solution. Not only do they satisfy your sweet tooth, but they also pack a punch of protein, fiber, and healthy fats to fuel your body. The best part? These cookies are incredibly easy to make and require only a few basic ingredients you likely already have in your pantry. In this article, you’ll learn how to make delicious protein cookies that are both simple and satisfying, all while helping you stay on track with your fitness and health goals.

Why Protein Cookies Are the Ultimate Healthy Snack

If you’ve ever found yourself digging into a bag of chips or reaching for sugary treats that leave you crashing later, you know how important it is to have a go-to snack that’s both healthy and filling. This is where protein cookies come in. They’re the perfect snack for anyone looking to balance nutrition with indulgence.

Key Benefits of Protein Cookies:

  • High in Protein: Protein helps build and repair muscles, supports healthy skin, and keeps you feeling full longer.
  • Quick and Easy: Making protein cookies requires little effort. No need to fuss with complicated recipes, and no baking required if you want a no-bake version.
  • Customizable: Whether you’re following a vegan, gluten-free, or low-carb diet, you can easily tweak the ingredients to fit your dietary preferences.
  • Delicious and Guilt-Free: You get the sweet flavor you crave without all the sugar, preservatives, or artificial ingredients that often come with store-bought cookies.

Now that you know why these protein cookies are a game-changer, let’s dive into the simple ingredients you’ll need to make them.

Key Ingredients for Delicious Protein Cookies

Making protein cookies at home is all about using the right ingredients. Luckily, you don’t need any fancy or hard-to-find items. Here’s what you’ll need:

1. Protein Powder

The foundation of these cookies, protein powder adds that extra protein boost you need. Whether you prefer whey, plant-based, or pea protein, it’s important to choose a flavor that you enjoy. Vanilla and chocolate are popular choices, but feel free to get creative with your protein powder selection.

2. Nut Butter

Nut butters like peanut butter, almond butter, or cashew butter are excellent sources of healthy fats and protein. They provide moisture to the cookies and give them a deliciously rich flavor. Be sure to choose a nut butter that has no added sugar or preservatives for a healthier option.

3. Oats

Oats are the secret to giving your protein cookies the right texture and chewy bite. They’re also a great source of fiber, which helps with digestion and keeps you feeling satisfied. For the best results, use rolled oats instead of quick oats, as they give a more substantial texture.

4. Bananas (Optional)

Bananas naturally sweeten your cookies and add moisture. If you’re not into overly sweet treats, you can skip this or substitute with another sweetener like maple syrup or honey.

How to Make Protein Cookies in 5 Easy Steps

Ready to make your own batch of protein cookies? You’re just a few steps away from a batch of delicious, nutritious treats. Here’s how to do it:

Ingredients List

IngredientAmountNotes
Protein Powder1 scoopChoose your preferred flavor (vanilla, chocolate, etc.)
Nut Butter½ cupPeanut butter, almond butter, or cashew butter
Oats1 cupUse rolled oats for better texture
Banana1 ripeMashed, optional for sweetness
Sweetener (optional)1 tbspMaple syrup, honey, or stevia

Step-by-Step Instructions

  1. Mash the Banana
    Start by mashing the ripe banana in a large mixing bowl until it’s smooth. This will provide both natural sweetness and moisture to your cookies.
  2. Mix in the Nut Butter and Sweetener
    Add the nut butter of your choice (peanut, almond, or cashew) to the mashed banana. Stir it well until the mixture becomes creamy. If you prefer a sweeter cookie, add a tablespoon of maple syrup or honey.
  3. Add the Protein Powder and Oats
    Now it’s time to incorporate the protein powder and oats. Stir the mixture until everything is evenly combined. The oats will give the cookies a chewy texture, while the protein powder ensures they pack the punch you need.
  4. Shape the Cookies
    Using your hands or a cookie scoop, form small dough balls and place them on a baking sheet lined with parchment paper. Gently flatten each cookie to your desired thickness.
  5. Bake or Chill
    If you’re making baked protein cookies, preheat the oven to 350°F (175°C) and bake for 10-12 minutes until they turn golden brown. If you prefer no-bake protein cookies, place them in the fridge for about 30 minutes to firm up.

Tips and Tricks for Perfect Protein Cookies

Making the perfect protein cookie is easy once you know a few tips and tricks. Here are some expert suggestions to get your cookies just right:

Texture Tips:

  • For Softer Cookies: Use more banana or more nut butter to keep your cookies soft and chewy.
  • For Crunchier Cookies: Add more oats and bake them a little longer.
  • If the dough is too sticky: Add a little more protein powder or oats to balance the consistency.

Flavor Variations:

  • Chocolate Chip Protein Cookies: Add a handful of dark chocolate chips for a decadent twist.
  • Cinnamon Spice: Stir in ½ teaspoon of cinnamon to add a warm, cozy flavor.
  • Nutty Delight: Mix in chopped nuts like walnuts or almonds for extra crunch.
  • Fruity Protein Cookies: Add dried cranberries, raisins, or even blueberries for a burst of flavor.

How to Store and Meal Prep Protein Cookies

Once your cookies are made, the next step is storage. You’ve worked hard to make these healthy treats, so you’ll want to keep them fresh for as long as possible.

Storage Tips:

  • Refrigerate: Store the cookies in an airtight container in the fridge for up to 5 days.
  • Freeze: For longer storage, freeze them in a single layer on a baking sheet and then transfer them to a freezer-safe container. They’ll keep for up to 3 months.
  • Room Temperature: If you’re planning to eat them within a couple of days, you can keep your cookies at room temperature in an airtight container.

Meal Prep Tips:

These cookies are perfect for meal prepping! Make a large batch on the weekend and have a healthy snack ready to go throughout the week. Simply store them in individual portions for convenience.

FAQs: Everything You Need to Know About Protein Cookies

Are protein cookies healthy?

Yes! Protein cookies are made with wholesome ingredients like oats, nut butter, and protein powder. They provide a healthy balance of protein, fiber, and healthy fats, making them a great snack option for anyone looking to stay on track with their fitness goals.

Can I use any protein powder for these cookies?

Absolutely! You can use whey, vegan, or plant-based protein powder. Just choose the flavor you enjoy most, as it will influence the taste of your cookies.

Can I make these cookies without oats?

Yes! If you prefer a low-carb or gluten-free option, you can replace the oats with almond flour or coconut flour. Keep in mind that this will change the texture slightly.

How do I make the cookies sweeter?

If you want a sweeter cookie, you can add natural sweeteners like maple syrup, honey, or stevia. Alternatively, try adding more ripe bananas for a naturally sweetened cookie.

Can I bake these protein cookies?

Yes! If you prefer a baked version, simply bake at 350°F (175°C) for 10-12 minutes. For a chewy texture, bake for less time. For a crispier cookie, bake for longer.

Conclusion: Your New Favorite Snack is Just a Few Steps Away

There’s no need to sacrifice flavor for nutrition when you can make these delicious protein cookies. With just a few simple ingredients, you can create a satisfying snack that fuels your body and satisfies your cravings. Whether you’re following a specific diet or just looking for a quick and healthy snack, these protein cookies are the perfect solution.

Ready to try this recipe? Whip up a batch today and enjoy a guilt-free, protein-packed treat that keeps you energized and satisfied. Don’t forget to share your variations with us—what add-ins do you love to include in your cookies?

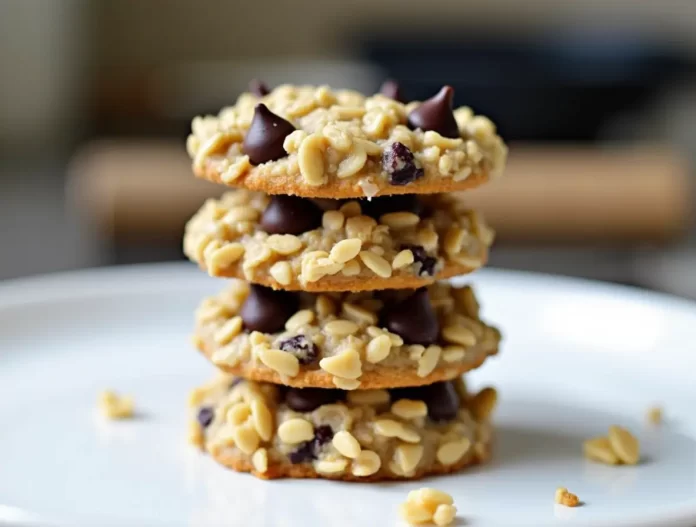
Healthy Flourless Pumpkin Chocolate Chip Oatmeal Protein Cookies: A Guilt-Free Treat You’ll Love

0

If you’re someone who loves a warm, gooey cookie but wants to stay on track with your health goals, then you’re in for a treat. Imagine sinking your teeth into a rich, chewy cookie, knowing that it’s packed with wholesome ingredients that fuel your body rather than sabotage your diet. These Healthy Flourless Pumpkin Chocolate Chip Oatmeal Protein Cookies provide the perfect balance of indulgence and nutrition. They’re packed with fiber, protein, and healthy fats—without any flour or refined sugars.

Whether you’re a fitness enthusiast, a busy mom, or just someone looking to satisfy your sweet tooth in a healthier way, these cookies are perfect for any occasion. In this article, we’ll show you how easy it is to make these delicious, guilt-free cookies at home, with a recipe that’s simple, customizable, and bursting with flavor. Let’s dive into why you’ll love these cookies and how they can easily become your go-to snack.

Why Healthy Flourless Pumpkin Chocolate Chip Oatmeal Protein Cookies Are Perfect for You

You might think that healthy cookies can’t be indulgent or delicious, but these flourless pumpkin chocolate chip oatmeal protein cookies will prove you wrong. Here’s why you’ll love them:

1. Packed with Protein for Sustained Energy

These cookies are loaded with protein, thanks to the addition of your favorite protein powder. Protein not only supports muscle recovery and growth but also keeps you feeling fuller for longer. So, whether you need a post-workout snack or a quick meal replacement, these cookies will keep you satisfied and energized.

2. Rich in Fiber for Digestive Health

The combination of oats and pumpkin provides a substantial amount of fiber. Fiber is crucial for healthy digestion, helps to regulate blood sugar levels, and keeps you feeling fuller. These cookies are a great way to incorporate more fiber into your diet while enjoying a tasty treat.

3. No Flour, No Problem

You don’t need flour for these cookies to have the perfect chewy texture. Using oats and pumpkin as the base, you’re creating a cookie that’s naturally gluten-free and flourless, making them suitable for those with dietary restrictions or anyone trying to cut out unnecessary carbs.

4. Low in Sugar, High in Flavor

Say goodbye to cookies loaded with refined sugars. These cookies are sweetened naturally with the mild sweetness of pumpkin and just a hint of chocolate. If you’re craving something sweet but don’t want a sugar crash later, these cookies are the perfect solution.

5. Perfect for Meal Prep and Snacking

One of the best things about these cookies is how easy they are to make in batches. Bake a big batch on Sunday, and you’ll have a week’s worth of delicious, protein-packed snacks ready to go. They’re perfect for a grab-and-go snack, an energy boost after your workout, or even a healthier dessert option.

Key Ingredients for Healthy Flourless Pumpkin Chocolate Chip Oatmeal Protein Cookies

You won’t need any fancy or hard-to-find ingredients for these cookies. The list is short and simple, and it’s packed with nutrient-dense foods that benefit your body. Here’s what you’ll need:

1. Protein Powder

Protein powder is the secret ingredient that helps turn these cookies into a high-protein powerhouse. You can choose from a variety of protein powders—whether whey, plant-based, or even egg white protein, depending on your dietary preferences. Vanilla or chocolate protein works best, but feel free to experiment with other flavors.

2. Canned Pumpkin

Canned pumpkin is a key player in this recipe, lending a moist, chewy texture to your cookies. Beyond texture, it’s packed with vitamins like A and C, along with fiber and antioxidants that help support your immune system and keep your skin glowing.

3. Rolled Oats

Oats give the cookies a hearty texture and are full of fiber, which aids digestion and helps stabilize blood sugar. They also add a satisfying chewiness that’s often missing in flourless cookies. Be sure to use rolled oats instead of instant oats for the best texture.

4. Chocolate Chips

What would a cookie be without chocolate? While you don’t need to go overboard on the sugar, a handful of dark chocolate chips or semi-sweet chips adds a delicious indulgent touch. Dark chocolate, in particular, is a good source of antioxidants and can help curb your sweet cravings in a healthier way.

5. Nut Butter

Nut butter, whether it’s peanut, almond, or cashew butter, brings richness and moisture to the dough, while also providing healthy fats. It’s the ingredient that ties everything together, so be sure to choose a variety with no added sugars or preservatives.

How to Make Healthy Flourless Pumpkin Chocolate Chip Oatmeal Protein Cookies: Step-by-Step Guide

Making these cookies is incredibly simple and can be done in less than 30 minutes. Here’s how:

Ingredients

IngredientAmountNotes
Protein Powder1 scoopVanilla or chocolate flavor works best
Canned Pumpkin½ cupPure pumpkin puree, not pumpkin pie filling
Rolled Oats1 cupFor best texture and chewiness
Dark Chocolate Chips¼ cupUse dark chocolate for a healthier option
Nut Butter2 tbspPeanut, almond, or cashew butter
Sweetener (optional)1 tbspMaple syrup, honey, or stevia
Cinnamon½ tspAdds warmth and enhances flavor
Baking Soda½ tspHelps with texture and rise

Instructions

  1. Preheat Your Oven and Prepare Your Baking Sheet
    Start by preheating your oven to 350°F (175°C). Line a baking sheet with parchment paper to ensure your cookies don’t stick and for easy cleanup.
  2. Mix Wet Ingredients
    In a large mixing bowl, combine the canned pumpkin, nut butter, and sweetener (if using). Stir until everything is well incorporated and smooth.
  3. Add Dry Ingredients
    Add the protein powder, oats, baking soda, and cinnamon into the wet mixture. Stir until all the ingredients are combined and the dough becomes thick and slightly sticky.
  4. Fold in the Chocolate Chips
    Once the dough is ready, fold in the chocolate chips, making sure they are evenly spread throughout the dough.
  5. Shape the Cookies
    Using a tablespoon or cookie scoop, portion the dough onto your prepared baking sheet. Flatten each dough ball slightly with the back of the spoon to form a cookie shape.
  6. Bake and Cool
    Bake the cookies for 10-12 minutes, or until the edges are golden brown. Allow the cookies to cool on the baking sheet for a few minutes before transferring them to a wire rack to cool completely.

Tips for Perfect Healthy Flourless Pumpkin Chocolate Chip Oatmeal Protein Cookies

  • Adjust the Consistency: If your dough is too thick, add a small amount of almond milk or water to help loosen it up. If it’s too runny, add a little extra protein powder or oats to thicken it.
  • Customize the Add-ins: Feel free to add chopped nuts, seeds, or dried fruit like raisins or cranberries for an extra nutritional boost and texture.
  • Choose the Right Protein Powder: While any protein powder can work, consider using one that has a flavor you like, as it will enhance the overall taste of the cookies. Vanilla protein works great with the pumpkin flavor!

Storing Your Healthy Flourless Pumpkin Chocolate Chip Oatmeal Protein Cookies

1. At Room Temperature:

If you plan to eat them within a few days, store your cookies in an airtight container at room temperature for up to 5 days.

2. In the Refrigerator:

For longer freshness, store them in the fridge where they’ll last up to two weeks.

3. Freezing for Later:

You can freeze these cookies for up to 3 months. Just place them in a freezer-safe bag or container, and thaw as needed.

FAQ: All Your Questions About Healthy Flourless Pumpkin Chocolate Chip Oatmeal Protein Cookies

Are these cookies really flourless?

Yes! These cookies are completely flourless, using oats and protein powder instead of traditional flour. This makes them suitable for gluten-free diets.

Can I use a different kind of nut butter?

Absolutely! You can use peanut butter, almond butter, or even cashew butter—whichever you prefer.

How can I make these cookies vegan?

To make these cookies vegan, simply choose a plant-based protein powder and swap the honey for maple syrup or agave nectar.

How can I make these cookies sweeter?

If you like sweeter cookies, you can add extra sweetener, such as maple syrup or stevia. Just be sure to keep it balanced so that they stay healthy.

Conclusion: Enjoy a Delicious, Healthy Treat Anytime

These Healthy Flourless Pumpkin Chocolate Chip Oatmeal Protein Cookies are not only a healthier alternative to traditional cookies, but they also taste absolutely amazing. Packed with protein, fiber, and the natural sweetness of pumpkin and chocolate, they’re the perfect treat for any time of the day. Whether you’re looking for a post-workout snack or a cozy fall treat, these cookies hit the spot. Try them today and share your experience with us in the comments

No-Bake Banana Oatmeal Cookies – Only 3 Ingredients (Easy & Healthy!)

0
No-Bake Banana Oatmeal Cookies

Are you craving a quick, healthy, and delicious snack that doesn’t require baking? These No-Bake Banana Oatmeal Cookies are the perfect solution! With just three simple ingredients, you can whip up a batch of chewy, naturally sweet cookies in no time. Whether you need a grab-and-go breakfast, a post-workout snack, or a guilt-free dessert, this recipe has you covered.

Why You’ll Love These No-Bake Banana Oatmeal Cookies

Only 3 Ingredients – No fancy or hard-to-find ingredients.
Healthy & Nutritious – Naturally sweetened, packed with fiber and protein.
Quick & Easy – No baking required, ready in minutes!
Perfect for All Diets – Vegan, dairy-free, and gluten-free options available.
Customizable – Easily add your favorite mix-ins for extra flavor.

Key Ingredients for No-Bake Banana Oatmeal Cookies

The magic of this recipe lies in its simplicity. You only need three wholesome ingredients, each bringing unique benefits:

IngredientHealth Benefits
Bananas 🍌Naturally sweet, rich in fiber & potassium.
Oats 🌾Provides fiber, protein & helps with digestion.
Peanut Butter 🥜Adds healthy fats, protein & a creamy texture.

Optional Add-ins:

  • Cinnamon – Adds a warm, comforting flavor.
  • Dark Chocolate Chips 🍫 – For a touch of indulgence.
  • Chia or Flaxseeds – Extra fiber & omega-3 boost.
  • Vanilla Extract – Enhances sweetness without added sugar.

How to Make No-Bake Banana Oatmeal Cookies (Step-by-Step Guide)

Ingredients List

IngredientAmountNotes
Bananas2 largeBest if ripe (for natural sweetness)
Rolled Oats1 ½ cupsUse old-fashioned oats for texture
Peanut Butter½ cupUse natural peanut butter (no added sugar)

Instructions

1️⃣ Mash the Bananas – In a large mixing bowl, mash bananas until smooth.
2️⃣ Mix Ingredients – Stir in peanut butter until well combined, then fold in oats.
3️⃣ Form Cookies – Scoop out small portions and shape into cookies.
4️⃣ Chill & Set – Place on parchment paper and refrigerate for at least 30 minutes.
5️⃣ Enjoy! – Store in the fridge for a quick snack anytime.

💡 Pro Tip: The riper the bananas, the sweeter the cookies! If your bananas aren’t ripe yet, you can microwave them for a few seconds to soften and enhance their sweetness.

Tips & Variations for the Best No-Bake Banana Oatmeal Cookies

Tips for Perfect Texture & Flavor

✔ Use ripe bananas for natural sweetness and moisture.
✔ Opt for creamy peanut butter for a smooth consistency.
✔ Adjust oat amount to control the texture – more oats for firmer cookies.
✔ If cookies seem too soft, refrigerate longer or add extra oats.

Fun Variations & Add-Ins

  • Vegan-Friendly: Use almond or cashew butter instead of peanut butter.
  • Protein Boost: Add a scoop of protein powder to the mix.
  • Dessert Version: Mix in dark chocolate chips or drizzle with melted chocolate.
  • Nut-Free Option: Swap peanut butter for sunflower seed butter.
  • Crunchy Twist: Add crushed nuts or coconut flakes for extra texture.

How to Store & Meal Prep These Cookies

📌 Fridge: Store in an airtight container for up to 5 days.
📌 Freezer: Freeze for up to 3 months—perfect for meal prep!
📌 Room Temperature: If you prefer a softer texture, let them sit out for a few minutes before eating.

FAQs – No-Bake Banana Oatmeal Cookies (Only 3 Ingredients)

Are no-bake banana oatmeal cookies healthy?

Yes! These cookies are made with natural ingredients, contain no refined sugar, and are rich in fiber and nutrients. They make a great healthy snack or dessert.

Can I make these cookies without peanut butter?

Absolutely! You can substitute peanut butter with almond butter, cashew butter, or even sunflower seed butter for a nut-free version.

Can I use quick oats instead of rolled oats?

Yes, but rolled oats provide a better texture and chewiness. Quick oats will make the cookies softer and more uniform in consistency.

How do I make these cookies firmer?

If your cookies are too soft, try the following:

  • Add more oats to absorb excess moisture.
  • Refrigerate for a longer period.
  • Use a thicker peanut butter.

Can I bake these cookies instead?

While this is a no-bake recipe, you can bake them at 325°F (163°C) for 10-12 minutes for a slightly crisp texture.

Conclusion – A Simple, Healthy Snack for Every Occasion

With only 3 ingredients, these No-Bake Banana Oatmeal Cookies are one of the easiest and healthiest treats you can make. They’re packed with natural sweetness, fiber, and protein, making them perfect for breakfast, snacks, or a quick energy boost.

Healthy Peanut Butter Cookies: A Guilt-Free Way to Satisfy Your Sweet Tooth

0

If you’re someone who loves to indulge in cookies but wants to stay mindful of your health, healthy peanut butter cookies might just become your new favorite treat. Gone are the days of choosing between a craving for something sweet and your desire to eat clean. You can have both! These cookies are made from simple, nutritious ingredients that won’t derail your health goals. In this article, we’ll walk you through everything you need to know about healthy peanut butter cookies—from why they’re a better choice to how you can make them at home and incorporate them into your daily routine.

Why Choose Healthy Peanut Butter Cookies?

When it comes to snacking, peanut butter cookies are an iconic favorite. The combination of rich, creamy peanut butter and a slightly sweet crunch is hard to beat. But traditionally, peanut butter cookies are packed with refined sugars, unhealthy fats, and processed ingredients that can leave you feeling sluggish after indulging. If you’re working on making healthier choices, you might think giving up these cookies is the only option.

That’s where healthy peanut butter cookies come in. By swapping out a few key ingredients, you can enjoy the same satisfying taste without the guilt. Here’s why you should consider making the switch:

  • Nutrient-Rich Ingredients: Healthy peanut butter cookies are often made with whole food ingredients such as natural peanut butter, almond flour, and organic sweeteners. These ingredients provide you with essential nutrients, protein, and healthy fats that nourish your body.
  • Lower Sugar and Carbs: Traditional peanut butter cookies are often loaded with refined sugar and flour, which can cause a spike in blood sugar levels and leave you feeling sluggish. Healthy versions use alternative sweeteners like honey or maple syrup and often opt for gluten-free flours, resulting in cookies that are much kinder to your waistline.
  • Customizable: You can easily adjust the recipe to suit various dietary preferences—whether you’re following a vegan, gluten-free, or keto diet. Plus, these cookies can be made with as many or as few add-ins as you like, such as dark chocolate chips, chia seeds, or even dried fruit.

Key Ingredients for Healthy Peanut Butter Cookies

What makes healthy peanut butter cookies so special? The key lies in choosing the right ingredients. Let’s take a closer look at the star players of this recipe and how they benefit your health.

Natural Peanut Butter

Peanut butter is the cornerstone of these cookies, but it’s essential to choose the right kind. Most commercially available peanut butters contain added sugars, oils, and preservatives that detract from their nutritional value. Opt for natural peanut butter, which contains just peanuts (and maybe a little salt) for the purest, most nutrient-dense option.

  • Benefits: Natural peanut butter is rich in protein, healthy fats, and fiber. These macronutrients keep you fuller longer and provide sustained energy throughout the day.

Sweeteners with a Difference

In traditional peanut butter cookies, white sugar is typically used to provide sweetness, but it offers no nutritional value. To make healthier cookies, it’s crucial to swap out refined sugar with more natural options.

  • Honey: A common natural sweetener, honey contains antioxidants, minerals, and a bit of fiber.
  • Maple Syrup: This alternative offers manganese, zinc, and iron, along with a deliciously rich flavor.
  • Stevia or Erythritol: For those looking for a low-sugar or low-calorie option, stevia and erythritol are great choices.

Flour Alternatives

Traditional all-purpose flour is high in refined carbs, which can lead to a blood sugar spike and leave you feeling sluggish. The good news is, there are healthier flour options that provide more nutrients while keeping your cookies soft and chewy.

  • Almond Flour: Made from ground almonds, this flour is a great gluten-free alternative and offers a healthy dose of protein, fiber, and vitamin E.
  • Oat Flour: This is another excellent gluten-free option. It’s rich in soluble fiber, which can help regulate blood sugar levels and support digestion.

Optional Add-Ins

While your basic peanut butter cookies are delicious on their own, you can take them up a notch with a few optional add-ins that will boost the nutrition even further.

  • Chia Seeds: Packed with omega-3 fatty acids, protein, and fiber, chia seeds are a great addition.
  • Flaxseeds: Known for their antioxidants and omega-3s, flaxseeds are a powerhouse for heart health.
  • Dark Chocolate Chips: For a little sweetness without overwhelming the flavor, opt for 70% or higher dark chocolate, which is loaded with antioxidants.

How to Make Healthy Peanut Butter Cookies

Now that you know what makes these cookies so healthy, let’s talk about how to bring them to life in your kitchen. Making healthy peanut butter cookies is surprisingly easy and only requires a few ingredients. Here’s a simple recipe to get you started:

Ingredients

IngredientAmountNotes
Natural Peanut Butter1 cupChoose peanut butter with no added sugar or oil
Almond Flour1 cupFor a gluten-free option
Baking Soda1 tspHelps with cookie texture
Sweetener (Honey or Maple Syrup)1/4 cupAdjust for sweetness preference
Egg1 largeFor binding and texture
Vanilla Extract1 tspAdds flavor
Optional Add-ins1/4 cup(e.g., chocolate chips, flaxseeds)

Instructions

  1. Preheat your oven to 350°F (175°C) and line a baking sheet with parchment paper.
  2. In a large mixing bowl, combine peanut butter, egg, sweetener, and vanilla extract. Stir until well combined.
  3. Add almond flour and baking soda to the mixture, mixing until fully incorporated. The dough should be thick but pliable.
  4. If you’re using any optional add-ins like chocolate chips or flaxseeds, fold them into the dough at this stage.
  5. Use a spoon or cookie scoop to form small balls of dough, placing them onto the baking sheet.
  6. Flatten each cookie with a fork to create a crisscross pattern.
  7. Bake for 8-10 minutes, or until golden brown around the edges.
  8. Allow the cookies to cool on the baking sheet for a few minutes before transferring them to a wire rack to cool completely.

Enjoy these soft, chewy treats as a snack or dessert, knowing they’re made with wholesome ingredients.

Tips for Perfect Healthy Peanut Butter Cookies

  • Don’t Overbake: Healthy peanut butter cookies can quickly dry out if overbaked. Aim for a light golden color around the edges, and remember that they will firm up as they cool.
  • Make Ahead and Freeze: You can prepare the cookie dough in advance, roll it into balls, and freeze them for later. This way, you can have fresh cookies on demand without having to make them from scratch each time.
  • Adjust the Sweetness: If you prefer a sweeter cookie, feel free to increase the amount of honey or maple syrup. If you’re watching your sugar intake, try using a stevia or erythritol blend.

Storing and Enjoying Your Healthy Peanut Butter Cookies

One of the best things about healthy peanut butter cookies is that they store well, making them perfect for meal prep or a week’s worth of snacks. Here’s how you can store them:

  • Room Temperature: Store your healthy peanut butter cookies in an airtight container at room temperature for up to 5 days.
  • Freezer: For longer storage, place the cookies in a freezer-safe bag or container. They will keep for up to 3 months. Simply thaw them overnight or warm them up in the microwave for a few seconds when you’re ready to eat.

Conclusion: Enjoy Healthy Peanut Butter Cookies Without the Guilt

Healthy peanut butter cookies are the perfect solution when you’re craving something sweet but don’t want to compromise your health goals. By using natural peanut butter, whole food flours, and healthier sweeteners, you can enjoy all the indulgent flavors you love, while nourishing your body at the same time.

So, the next time you’re in the mood for a sweet treat, skip the processed options and bake yourself a batch of healthy peanut butter cookies instead. They’re easy to make, customizable to your taste, and packed with nutrients that will keep you feeling satisfied and energized.

Give it a try—bake a batch today and enjoy guilt-free indulgence!

Transform Your Dinner Table with Crispy Cauliflower! 

0

Looking for a way to elevate your dinner game? This Crispy Cauliflower recipe is here to steal the show! Packed with bold flavors and the perfect crunch, this dish is not only satisfying but also a healthier alternative to fried snacks. Whether served as an appetizer, side dish, or even a main course, crispy cauliflower is versatile and absolutely irresistible. 

If you’re craving a dish that’s both nutritious and indulgent, this recipe will check all your boxes. Golden, crunchy cauliflower bites with a tender interior make for a crowd-pleaser that feels like a restaurant specialty. 

The best part? This dish is incredibly easy to make with ingredients you likely already have at home. Pair it with your favorite dip or enjoy it on its own—either way, you’re in for a treat! 

Perfect for weeknights, gatherings, or whenever you’re in the mood for something light yet hearty, this crispy cauliflower is guaranteed to be a hit. Ready to crunch your way to deliciousness? Let’s get started! 

 Ingredients 

– 1 medium head of cauliflower, cut into bite-sized florets 

– 1 cup all-purpose flour (or gluten-free alternative) 

– 1 cup breadcrumbs (panko for extra crunch) 

– 1/2 cup grated Parmesan cheese (optional for added flavor) 

– 1 tsp garlic powder 

– 1 tsp smoked paprika 

– 1/2 tsp chili powder (optional for a spicy kick) 

– Salt and black pepper, to taste 

– 2 large eggs, beaten 

– Olive oil spray or 3 tbsp olive oil for baking 

 Instructions 

 1. Prepare the Cauliflower 

– Preheat your oven to 400°F (200°C) or set your air fryer to 375°F (190°C). 

– Wash and pat dry the cauliflower florets. 

 2. Set Up Your Coating Station 

– In one bowl, combine flour, garlic powder, smoked paprika, chili powder, salt, and pepper. 

– In a second bowl, whisk the eggs. 

– In a third bowl, mix breadcrumbs with Parmesan cheese for added flavor. 

 3. Coat the Cauliflower 

– Dip each cauliflower floret into the flour mixture, then into the beaten eggs, and finally coat with the breadcrumb mixture. Ensure each piece is fully covered for maximum crunch. 

 4. Bake or Air Fry 

– For Baking: Place the coated florets on a baking sheet lined with parchment paper. Spray lightly with olive oil or drizzle with olive oil for even crispiness. Bake for 20-25 minutes, flipping halfway through, until golden brown and crispy. 

– For Air Frying: Arrange the florets in a single layer in the air fryer basket. Spray with olive oil and air fry for 15-18 minutes, shaking the basket halfway through. 

 5. Serve and Enjoy 

– Transfer the crispy cauliflower to a serving dish. Serve immediately with your favorite dipping sauce like ranch, spicy aioli, or marinara. 

 Tips for Crispy Perfection 

– Double Coating: For extra crunch, repeat the egg and breadcrumb step for a thicker coating. 

– Gluten-Free Option: Use almond flour and gluten-free breadcrumbs. 

– Make It Vegan: Swap eggs with a plant-based milk and cornstarch mixture. 

– Dipping Ideas: Try buffalo sauce, tahini dressing, or a creamy yogurt dip for variety. 

Why You’ll Love This Recipe: 

It’s simple, wholesome, and endlessly customizable. Perfect for a cozy night in or impressing your guests, this crispy cauliflower will leave everyone asking for seconds. 

Ready to crunch into something amazing? Fire up the oven or air fryer and let the cauliflower magic happen! 

Cheesy Shrimp Garlic Bread Delight 

0

Transform simple garlic bread into a luxurious, cheesy, shrimp-topped masterpiece! This quick and easy recipe combines golden, crispy bread with a creamy garlic shrimp topping, perfect as an appetizer or a meal in itself. Ready in under 30 minutes, this recipe is sure to impress! 

 Why This Recipe Works: 

– Perfect pairing: Juicy shrimp and gooey cheese complement crispy garlic bread beautifully. 

– Quick and easy: Ready in just 30 minutes with minimal prep. 

– Customizable: Adapt with different cheeses, seasonings, or even add veggies. 

– Simple ingredients: Everything you need might already be in your kitchen. 

 Ingredient Notes 

– Shrimp: Use peeled, deveined shrimp for ease. Fresh or frozen works well. 

– Bread: Choose a crusty baguette or sourdough for the best texture. 

– Cheese: Mozzarella and Parmesan for melty goodness with a salty kick. 

– Garlic Butter: A mix of butter, fresh garlic, and parsley for maximum flavor. 

 Ingredient Substitutions 

– Shrimp: Swap with cooked chicken, scallops, or mushrooms for a vegetarian option. 

– Bread: Use flatbread, ciabatta, or naan instead of baguette. 

– Cheese: Replace mozzarella with cheddar, Gruyère, or Monterey Jack. 

– Herbs: Use basil or thyme if parsley isn’t available. 

 Step-by-Step Instructions – Preparation 

STEP 1: Prep oven. Preheat to 375°F (190°C). 

STEP 2: Prep bread. Slice baguette lengthwise into halves. 

STEP 3: Prepare garlic butter. Mix softened butter with minced garlic and chopped parsley. Spread generously on bread. 

STEP 4: Prep shrimp. Toss shrimp with olive oil, paprika, salt, pepper, and minced garlic. 

 Cooking Instructions 

STEP 1: Sear shrimp. Heat olive oil in a skillet over medium heat. Cook shrimp for 2-3 minutes per side until pink and slightly golden. Set aside. 

STEP 2: Assemble bread. Layer garlic-buttered bread with mozzarella, shrimp, and a sprinkle of Parmesan. 

STEP 3: Bake. Place prepared bread on a baking sheet and bake for 10–12 minutes until cheese is melted and bubbly. 

STEP 4: Garnish. Top with fresh parsley and optional chili flakes for heat. Serve immediately. 

 Pro Tips 

– Use slightly stale bread for a crispier texture. 

– Don’t overcook shrimp—remove them from the heat as soon as they turn pink. 

– Broil for the last 1–2 minutes for a golden, bubbly top. 

 Cheesy Shrimp Garlic Bread Delight 

Golden, crispy bread loaded with juicy shrimp, melty cheese, and garlic butter goodness. 

Prep Time: 10 minutes 

Cook Time: 15 minutes 

Total Time: 25 minutes 

Servings: 4 

Calories: 320 kcal 

 Ingredients

US CustomaryMetric1x2x3x
1 baguette (sliced in half)1 large loaf
2 tbsp butter (softened)30g
3 cloves garlic (minced)3 cloves
2 tbsp fresh parsley (chopped)10g
200g medium shrimp (peeled, deveined)200g
2 tbsp olive oil30ml
1 tsp paprika1 tsp
Salt and pepperTo taste
1 cup mozzarella (shredded)100g
1/4 cup Parmesan (grated)25g

Optional Garnishes:

Lemon wedges

Chili flakes

 Storage 

– Refrigerate: Store in an airtight container for up to 2 days. 

– Reheat: Bake at 350°F (175°C) until warm. 

– Freezing not recommended: Best enjoyed fresh. 

 Notes: 

– Adjust cheese quantities for extra gooeyness. 

– Add lemon zest to shrimp for a fresh, zesty flavor. 

 Nutrition (per serving): 

– Calories: 320 

– Fat: 18g 

– Carbs: 25g 

– Protein: 20g 

– Fiber: 1g 

Serve this dish as a show-stopping appetizer or pair with a fresh salad for a complete meal. 

Let me know if you’d like any edits or additional details!

Cheesesteak Tortellini Bliss: A Flavor Explosion 

0

Cheesesteak Tortellini combines the savory flavors of a classic Philly cheesesteak with the creamy goodness of cheesy tortellini. This dish is an indulgent treat that’s ready in under 30 minutes, perfect for busy weeknights or when you’re craving a flavor-packed comfort meal! 

 🕒 Total Time 

– Prep Time: 10 minutes 

– Cook Time: 15 minutes 

– Total Time: 25 minutes 

 Ingredients 

– 1 tbsp olive oil 

– 1 tbsp unsalted butter 

– 1 lb (450g) sirloin steak or ribeye, thinly sliced 

– 1 medium onion, thinly sliced 

– 1 green bell pepper, thinly sliced 

– 1 red bell pepper, thinly sliced 

– 3 cloves garlic, minced 

– 1 (20 oz) package refrigerated cheese tortellini 

– 1 cup beef broth 

– 1 cup heavy cream 

– 1 cup shredded provolone cheese 

– 1/2 cup shredded mozzarella cheese 

– 1 tsp Worcestershire sauce 

– Salt and pepper to taste 

– Fresh parsley for garnish (optional) 

 Instructions 

 1. Cook the Tortellini: 

1. Bring a pot of salted water to a boil and cook tortellini according to package instructions. Drain and set aside. 

 2. Sear the Steak: 

1. Heat olive oil and butter in a large skillet over medium-high heat. 

2. Add sliced steak and cook for 2–3 minutes per side until browned. Season with salt and pepper, then remove from the skillet and set aside. 

 3. Sauté the Vegetables: 

1. In the same skillet, add the sliced onions and bell peppers. Cook for 4–5 minutes until softened. 

2. Add minced garlic and sauté for an additional 1 minute until fragrant. 

 4. Make the Sauce: 

1. Lower the heat to medium and pour in the beef broth, scraping up any browned bits from the bottom of the skillet. 

2. Stir in heavy cream and Worcestershire sauce, bringing the mixture to a gentle simmer. 

3. Gradually add provolone and mozzarella cheese, stirring until melted and smooth. 

 5. Combine and Serve: 

1. Return the cooked steak and tortellini to the skillet, tossing everything together until well coated in the sauce. 

2. Garnish with fresh parsley and serve hot. 

NutrientPer Serving (1 of 6)
Calories580
Protein33g
Carbohydrates34g
Fat35g
Saturated Fat15g
Cholesterol110mg
Sodium670mg
Fiber2g
Sugar3g

 Pro Tips 

– Steak Substitute: Use ground beef or thinly sliced chicken if steak isn’t available. 

– Cheese Variations: Replace provolone with white cheddar or Gruyère for a different flavor profile. 

– Veggie Boost: Add mushrooms or spinach for extra nutrition and flavor. 

Garlic Butter Chicken Bites with Creamy Parmesan Pasta 

0

Looking for a quick and indulgent meal that’s packed with flavor? These Garlic Butter Chicken Bites with Creamy Parmesan Pasta are the perfect combination of crispy, juicy chicken and rich, cheesy pasta. This dish is a guaranteed crowd-pleaser and surprisingly simple to prepare. 

 🕒 Total Time 

– Prep Time: 10 minutes 

– Cook Time: 20 minutes 

– Total Time: 30 minutes 

 Ingredients 

 For the Chicken Bites: 

– 500g (1 lb) boneless, skinless chicken breast, cubed 

– 2 tbsp olive oil 

– 2 tbsp unsalted butter 

– 4 cloves garlic, minced 

– 1 tsp paprika 

– 1/2 tsp onion powder 

– 1/4 tsp chili flakes (optional) 

– Salt and pepper to taste 

 For the Creamy Parmesan Pasta: 

– 250g (8 oz) pasta (fettuccine or penne work well) 

– 1 tbsp olive oil 

– 2 tbsp unsalted butter 

– 4 cloves garlic, minced 

– 1 cup heavy cream 

– 1 cup grated Parmesan cheese 

– 1/4 cup fresh parsley, chopped (optional) 

– Salt and pepper to taste 

 Instructions 

 1. Prepare the Chicken Bites: 

1. In a bowl, mix chicken cubes with paprika, onion powder, chili flakes, salt, and pepper. 

2. Heat olive oil and butter in a large skillet over medium heat. 

3. Add chicken cubes and cook for 6–8 minutes until golden brown and fully cooked. 

4. Add minced garlic during the last minute of cooking and stir well. Set the chicken aside. 

 2. Cook the Pasta: 

1. Boil pasta in salted water according to package instructions until al dente. Drain and set aside. 

 3. Make the Creamy Parmesan Sauce: 

1. In the same skillet, heat olive oil and butter over medium heat. 

2. Sauté minced garlic until fragrant (about 1 minute). 

3. Stir in heavy cream and let it simmer for 2–3 minutes. 

4. Add grated Parmesan cheese and stir until melted and creamy. 

5. Toss the cooked pasta in the sauce. Adjust salt and pepper to taste. 

 4. Combine and Serve: 

1. Plate the creamy Parmesan pasta and top with garlic butter chicken bites. 

2. Garnish with fresh parsley and additional Parmesan if desired. 


NutrientPer Serving (1 of 4)
Calories520
Protein35g
Carbohydrates40g
Fat25g
Saturated Fat13g
Cholesterol110mg
Sodium480mg
Fiber2g
Sugar2g

Tips 

– For extra flavor, marinate the chicken with the spices for 15–20 minutes.  

– Swap heavy cream with half-and-half for a lighter sauce. 

– Add a squeeze of lemon juice to brighten up the dish. 

Serve this dish with a crisp side salad or garlic bread for the ultimate comfort meal. Enjoy!